If you’ve ever picked up a freshly cut piece of acrylic, you’ll know the edge doesn’t always look like the clear, polished finish you see on a finished display, table or sign.
Straight off a saw or router, the edge is usually matt and you may still see fine cutting marks.
The good news is that acrylic finishes very well.
The trick is choosing the right finish for the job.
A straight display panel might suit diamond polishing. A curved piece may need flame polishing. A hidden edge might not need polishing at all.
At Cambrian Plastics, we finish acrylic in our Henderson workshop using several methods depending on the shape, thickness and final use. Our diamond polisher can handle acrylic up to 40 mm thick, while flame polishing gives us another option for curves and shapes that can’t go through the diamond polisher. So, what’s the difference?
What acrylic edge finishes are available?
There isn’t one “best” finish. It really comes down to what you’re making and how much of the edge people are actually going to see.
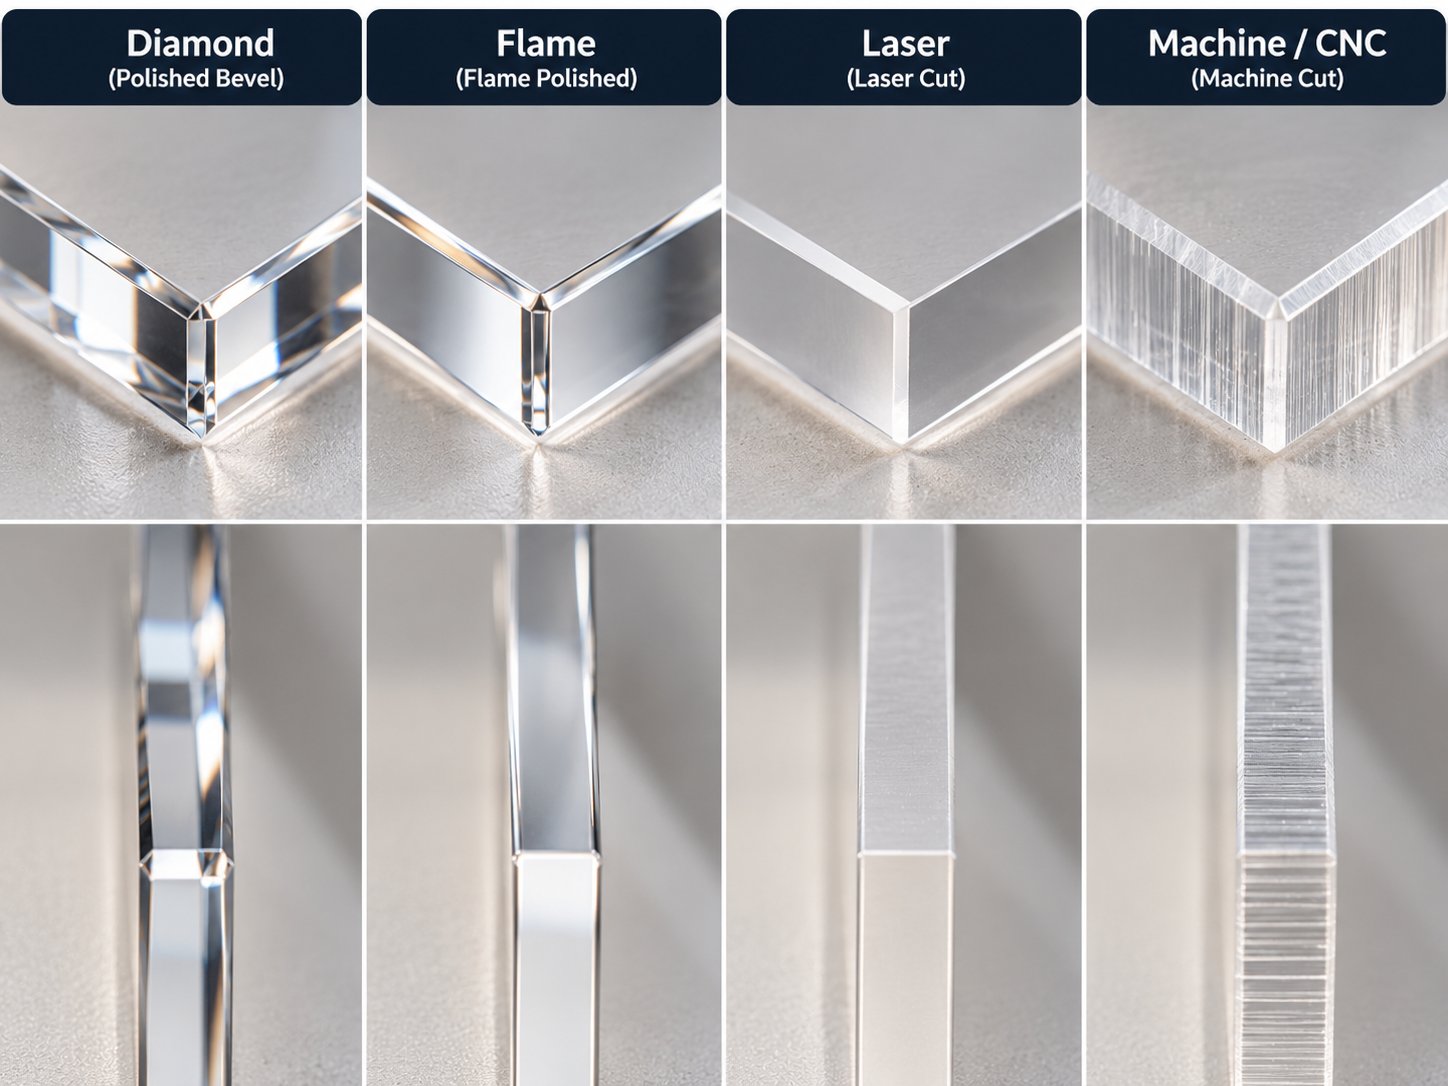
Machine-cut edge or CNC
This is the edge you get straight from a router or saw. It’s accurate and clean, but it has a slightly matt finish rather than a glass-clear look. That can be completely fine if the edge is going into a frame, against a wall, hidden in a joint or glued to another piece.
Laser-cut edge
Laser cutting works a little differently. As the laser moves through the acrylic, it melts the material along the cut, which can leave a smoother and sometimes glossy edge compared with a routed finish. It works particularly well for detailed shapes, lettering and smaller components. The final appearance can vary depending on the type and thickness of acrylic and the laser settings, so it’s worth choosing the process around the job rather than assuming every laser-cut edge will look identical. At Cambrian, we laser acrylic up to 15 mm thick.
Diamond polished acrylic
If you’ve seen a thick piece of acrylic with an edge that almost looks like glass, there’s a good chance it has been diamond polished. A diamond-tipped cutter removes a very fine layer from the edge, leaving it bright, smooth and clear.
It’s particularly good for straight edges on things like:
- shelving
- display blocks
- table pieces
- rectangular panels
- triangles and trapeziums
Because the machine works in a straight line, diamond polishing isn’t suited to circles, lettering or complicated curved shapes. It also removes a small amount of material during the finishing process, so if the finished dimensions are critical, tell us before the job is made. Our diamond polisher can handle acrylic up to 40 mm thick.
Flame-polished edge
Some shapes just can’t go through a straight-edge polishing machine. That’s where flame polishing comes in. A controlled flame passes quickly along the prepared acrylic edge. The surface softens just enough to smooth out the fine marks and bring back that clear, glossy appearance.
Because the flame is guided by hand, it can follow shapes that diamond polishing can’t, such as:
- circles
- curved panels
- internal cut-outs
- ovals
- lettering
- irregular shapes
But flame polishing isn’t there to rescue a badly cut edge. The edge still needs to be smooth first. Think of the flame as the final finishing step rather than the whole process. There’s also more skill involved than people sometimes realise. Too much heat can put stress into the acrylic and lead to fine cracking or crazing later. For that reason, it’s one of those jobs where a steady hand matters.
Bevelled edge
A bevel is slightly different again. Instead of keeping the edge square, we machine it at an angle. That angled edge catches the light nicely and can give a piece of acrylic a more finished, almost furniture-like look. It can work particularly well on:
- table tops
- shelves
- display pieces
- decorative acrylic
It also makes the edge feel softer in the hand. Bevelling isn’t suitable for every shape though for example, we don’t offer it on lettering or stars. For polycarbonate and PVC, we generally offer either a machine-cut or bevelled edge rather than the polishing methods used on acrylic.
Could I polish acrylic edges myself?
Yes. For a small DIY job, you absolutely can polish acrylic by hand if you have the patience. The process is fairly straightforward, but it’s one of those jobs where rushing usually shows in the final result. Start with the edge itself. If there are large saw marks or chips, deal with those first.
Then wet-sand the perspex gradually, starting with a coarser grit and working your way through finer grades.
A typical progression might be:
- 180–320 grit
- 400 grit
- 600 grit
- 800 grit
- 1200 grit or finer
Use water, light pressure and a sanding block where possible. The water helps control heat and keeps acrylic dust down. Once the edge is properly smooth, you can buff it using a soft cloth or polishing wheel with a plastic polish suitable for acrylic.
Buffing creates the shine. Sanding creates the finish.
If deep marks are still there before you start buffing, polishing compound won’t magically remove them. And keep the acrylic moving while buffing. Too much pressure or heat in one spot can make things worse rather than better. For a one-off shelf or small DIY piece, hand finishing can work well. If you’re working with a large display, thick acrylic, or a piece where the edges really matter, bring it to Cambrian Plastics. We can take care of the finishing and make sure the edge suits the job.
What about flame polishing at home?
This is where we’d be more cautious. Flame polishing looks simple when you watch someone experienced do it.
Quick pass. Clear edge. Done.
But there’s quite a bit happening in that few seconds. The flame needs to move at the right speed and distance. Too much heat can build stress into the acrylic, and that stress can show up later as crazing — those tiny networks of cracks you sometimes see around an acrylic edge. Some coloured acrylics can also react differently to heat. For most home projects, sanding and buffing is the safer option.
If you’ve got curves, cut-outs or complicated shapes that really need a flame-polished finish, it’s usually worth getting Cambrian Plastics to handle it.
How do you get that really clear acrylic edge?
There isn’t one magic polishing method. A good result normally starts much earlier in the process.
Start with a good cut
The smoother and more accurate the starting edge, the less work it needs afterwards.
Match the method to the shape
For straight edges, diamond polishing is usually our first choice. For curves and irregular outlines, flame polishing is much more practical. For smaller jobs or repairs, sanding and buffing can work perfectly well.
Watch the heat
Heat is one of the biggest things to control when working with acrylic. Whether you’re buffing or flame polishing, overheating can cloud the finish or put stress into the material.
Think about the acrylic itself
Clear, tinted and coloured acrylic can behave differently. If you’re experimenting at home, test the process on an offcut before touching the finished piece.
Keep everything clean
Dust and debris have an annoying habit of appearing right when you’re trying to get a perfect finish. Use a clean, soft cloth and cleaners designed for acrylic rather than strong solvents or ordinary household glass cleaners.
Which edge finish lasts best outdoors?
This question comes up quite a bit, especially with marine, signage and outdoor display work. What matters more is the material itself and how much stress has been introduced during fabrication. Cast acrylic already performs well outdoors because of its UV resistance. For tougher applications, we can also look at impact-modified acrylic.
The finishing process still matters because excessive heat from polishing or fabrication can increase stress in the sheet. So rather than choosing an edge finish because somebody says it is “the most weatherproof”, we’d look at the whole job:
Where is it going?
How exposed will it be?
What material are we using?
What does the edge need to look like?
That normally gives you a much better answer.
What polish should you use on acrylic?
There’s a difference between polishing an acrylic edge and removing scratches from the face of the sheet. For light surface scratches or haze, use a polish specifically made for acrylic or plastics with a soft microfibre cloth. Avoid strong solvents, abrasive household cleaners and products that aren’t intended for acrylic.
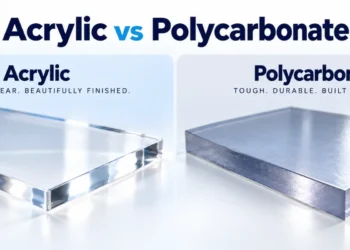
If the scratches are deeper, you may need to wet-sand the area first and gradually work through finer grades before polishing. One important thing to remember: polycarbonate behaves differently from acrylic, so don’t assume the same polishing method will work on both materials.
So, which finish should you choose?
A simple way to think about it is:
Straight perspex edge finishes that needs to look clear?
Diamond polish.
Curved or irregular edge?
Flame polish.
Decorative furniture or display edge?
Consider a bevel.
Edge hidden in a frame or joint?
A clean machine-cut finish may be all you need.
Small DIY project?
Sanding and buffing can work well if you’ve got the time. The goal isn’t to put the most expensive finish on every edge. It’s to put the right finish where it actually makes a difference.
What should you send us for a quote?
If you’ve got an acrylic project in mind, you don’t need to arrive with a perfect technical drawing.
Send us what you have.
Useful information includes:
– the overall size
– acrylic thickness
– clear, tinted or coloured material
– whether the job will live indoors or outdoors
– which edges will actually be visible
– quantity
– any dimensions that need to stay exact
A PDF, DXF, DWG, CDR or EPS drawing is helpful, but a sketch, photo or sample can also be a good place to start.
If you’re not sure which finish you need, that’s fine too. Tell us what you’re making here and where it’s going, and we can work through the options with you.